You asked for it, and today we deliver.
For the past 7 years we’ve received many requests for our list of bodyweight exercises. So today, we’ve decided to publish it for free.
It’s organized by the part of the body on which the exercise focuses and by difficulty.
Please note that this is only a list of exercises. We’ve used it in the past to build our bodyweight training program and our training plans.
We also recommend checking out our list of best calisthenics programs if you’re looking for a paid course.
For ease of use, we’ve included a table of contents below.
So without further ado, here it is, our complete list of bodyweight exercises:
Cardio
Cardio Bodyweight Beginner Exercises
Jumping Jack
The Jumping Jack is a very popular, full-body warmup exercise, it’s used in nearly every sport, so here is how you do it. Stand in an upright position with your feet together side by side and arms extended along the body. Your head should be directed forward.
Then, bend your knees slightly and use your soles and toes to bounce.
During the bounce, separate your legs from each other (the right leg goes to the right and the left leg to the left), and then raise your arms above the head with slightly bent elbows (perform full 180 degree amplitude). Land with your hands over your head and legs apart, in whole steps. Bend your knees again and jump into the starting position – lower your arms down and get your legs together
Here is some additional advice to performing the exercise properly, do not lock your knees. Exhale as you lift your arms up, and breathe in as you return to the starting position. Do not lean your torso forward when landing.
Half Burpee
To perform this exercise, begin in a push-up position and then proceed to hop your feet to the outsides of your hands. Make sure that your knees are in line with your ankles and quickly Jump into the air, lifting your hands up overhead then, return hands to the ground and hop feet back into push up position. Repeat as quickly as can be controlled.
This exercise is definitely a full-body exercise, burpees are one of the best ways to burn a lot of calories quickly and this version is no exception.
Cardio Bodyweight Intermediate Exercises
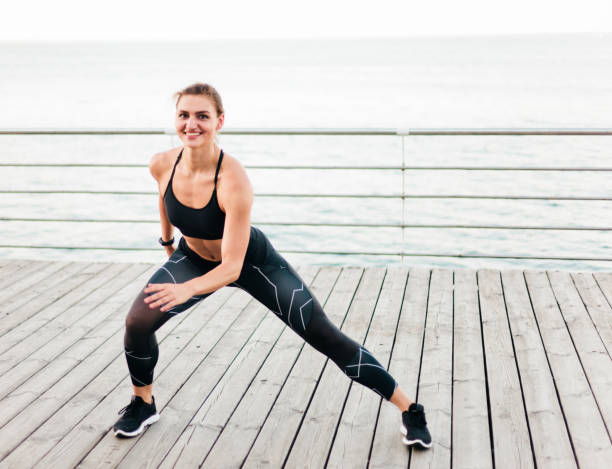
Jump Squat
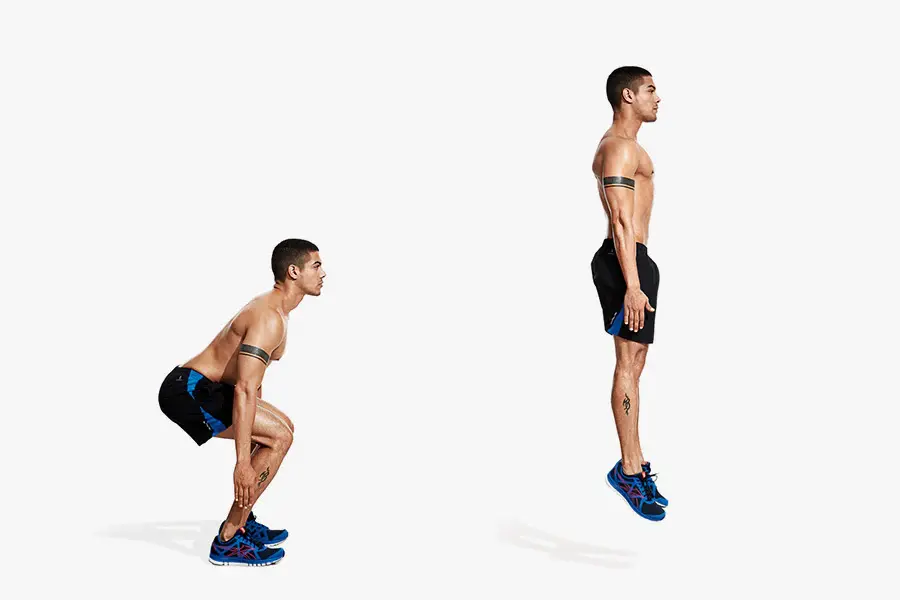
Position your feet shoulder-width apart, then Squat and tilt your body slightly forward
Stretch your arms forward, cross them in front of your chest (palm-elbow) or place them behind your neck, then comes the jump part, get up as fast as you can, trying your best to make the jump As you land, lift and stretch your arms up, then proceed to land on your toes to load your calves without sticking your heels to the floor. Squat and return your arms and body to the starting position.
This exercise is primarily a leg exercise and with is explosive nature it is sure to make your leg muscles sore for a long time.
Lateral Jump

Kneel down quickly and bring your hands back. Jump to the side, sharply expanding your pelvis and pushing your feet off the floor. At the same time, push your hands forward. Land at the same time with both feet slightly bent toes and then with the rest of the foot. Kneel on landing to absorb impact.
Stand up, then bounce to the side and land again with both feet on the same side When in contact with the ground, kneel slightly to absorb the impact force. Then, repeat the jump. You perform the set number of repetitions, then switch to the other side and repeat the same. You can continue in the same direction of movement.
This exercise works on all the leg muscles, it is an intensive exercise and can be used to warm up your legs and whole body.
Tuck Jump
To perform Tuck Jumps Stand with your feet shoulder-width apart, then bend your hips and knees in order to lower your body into a squatting position. Hips and knees bent, chest lined up with your toes, looking forward, and ready to jump up. Your torso should be about 45 degrees to the floor with your lower back in its natural arch. Swing your arms back as you bend your hips back so that they run parallel to your spine.
Then, Immediately rise up, through your hips, knees, and ankles and up to jump as high as you can. As you rise, pull your knees upward with you, tucking them under your chest at an above 90 degree angle Your thighs should end up parallel to the floor. Extend your knees on the descent and use your toes to buffer your feet as you land, bending your hips and knees as needed to absorb the force of the ground, although you should end in the same athletic position that you started the jump.
Jumping Lunge
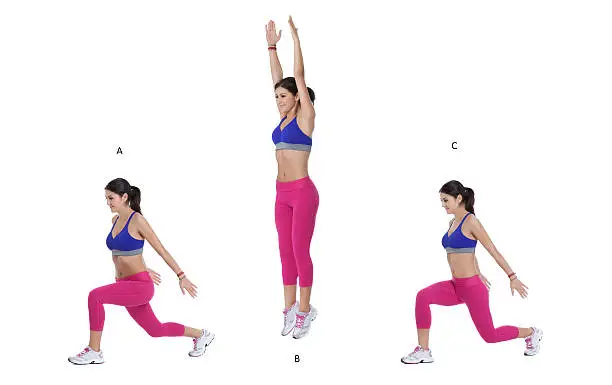
Start by standing upright and take a step forward, bending at the knee straight down at slightly less than 90 degrees., lift yourself by jumping in the air, by pushing up explosively with your legs. Then when landing proceeds to bend the other leg the same way as described and repeat the motion.
In this exercise, you should really focus on continuing the motion as this is a cardio-esq exercises meant to help you warm up or used as a calorie burner.
Burpee
One of the Most effective Fat-burning bodyweight exercises, it can burn more than 15 calories per minute! So here is how to do it properly:
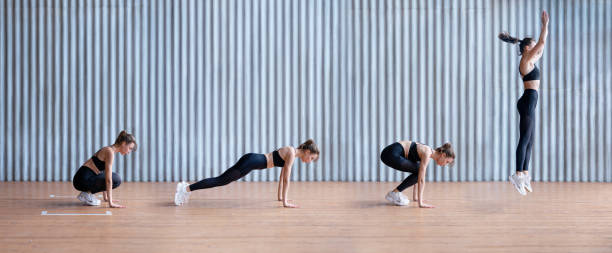
Squat down and place your palms slightly wider than the shoulders on the floor in front of you, then Without changing the position of the upper body, kick back, Land on your toes with your body stretched in a plank position, Do a normal pushup, Again, without moving the upper body, return the legs to the starting position – with their hands on the floor, Jump up, clap with your hands over your head, Land in the starting position.
Additionally, Do not allow the abdomen and / or pelvis to sink down, to bend in the opposite direction, and hold the body posture at all times while on your palms and fingers. Try to place your palms as close as possible to your feet.
Cardio Bodyweight Advanced Exercises
Levitating Ape
Crouch down to a squat position, position your hands on the floor in front of you inside the legs, put your weight into your hands and elevate your body as high as possible, aiming to reach a tuck handstand, bringing it frowards. Move around the room in this manner, from one side to the other.
Jumping Skater Squa
Jumping skater squats are great, but they are a very difficult exercise that many people struggle to do at first. Most people can’t just jump into a full unassisted skater squat jump without working up to it so be careful, this exercise requires a lot of balance and concentration.
Start from an upright position then, proceed to bounce to the right and step on your right foot, whilst your left foot is positioned diagonally behind your right leg without stepping on it. The hands should move perpendicularly as if in a running motion, then bounce left and switch up the legs.
Single-Leg Jump Squat
This exercise is a modified single leg squat with a jump at the end, to perform this exercise strat by standing on one leg then proceed to squat down, and jump straight up as high as the can. As you jump upwards use your arms to propel yourself up.
Land on the same foot as lightly as you can, and as you land, dip back into a squat position and then jump again. After the desired amount of repetitions switch legs.This exercise is a great way to correct any muscle imbalances in your legs as its explosive nature really helps you get
Core
Core Bodyweight Beginner Exercises
Sit-Up
The Sit-up is a classic abdominal exercise, here is how you perform it, Lie on the floor with your legs bent at the knees and your feet on the ground. Stretch your arms over your head and grasp them (the top of the arms goes past the ears). The hands remain static all the time in this position. Lift your torso and shoulders off the floor until you straighten your torso up, when you reach the top position hold for a moment, then return to the starting position.
Crunch
To perform the classic crunch, you have to lie on your backs, bend your legs in the knees. Put your hands behind your neck and then, lean with your chest towards your stomach until you starting feeling your abs contracting, then lean backwards, and repeat.
The exercise itself is not that difficult, but a set of 20 reps will give you everything you need. To get all the benefits of the crunch focus on achieving reps that are slow and controlled, this will definitely give you a nice ab workout.
Reverse Crunch
In order to perform a reverse crunch, firstly you need to lie flat on your back with your hands under your hips. Bend your knees and lift them towards your head, drawing them as close as possible and pushing them upwards slightly at the end of the movement. To complete one rep, assume the starting position.
The reverse crunch is a core exercise, a twist on the regular crunch, this abdominal exercises puts a lot more stress on your abs than the conventional crunch while eliminating the possibility of “cheating” by getting your legs out of the equation.
Flutter Kick
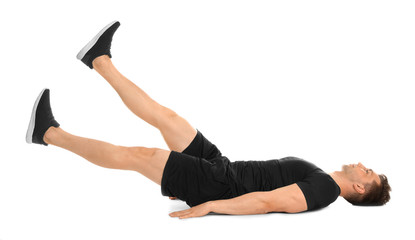
Firstly, Lie on your back on the floor, You can use a yoga mat if you want then, Put your hands, palm down under your glutes and lower back for a slight lift, after that. Raise your legs above the ground, at a slight angle and keep them straight.
While keeping your legs straight, raise one leg up while lowering down the other. To have even better results, tighten your core as much as possible to feel the tension in your abs.
Flutter Kicks are a really good way to strengthen your lower core significantly but only if you know how to do them correctly. Additionally doing exercises with poor form and posture will nearly always lead to injury, in particular, flutter kicks can cause you back pain when done an improper technique.
Bicycle
Lie on the floor and place your hands behind your nape. Lift your shoulders off the floor while bringing your knees closer to your chest. Begin the exercise by slowly bringing your right elbow to your left knee whilst stretching your right leg forward, then change direction by moving your feet as if you were pedaling on a bicycle. This is one of the best exercises to shape the abs and outer oblique abdominal muscles
Core Bodyweight Intermediate Exercises
One Leg L-sit
Sit on the floor with your legs extended in front of you, keeping them straight. Put your hands on the floor, next to the hips and raise your body from the ground, keeping only your feet in contact with the floor. Raise one leg and keep it in the air for as long as you can. Repeat for the other leg.
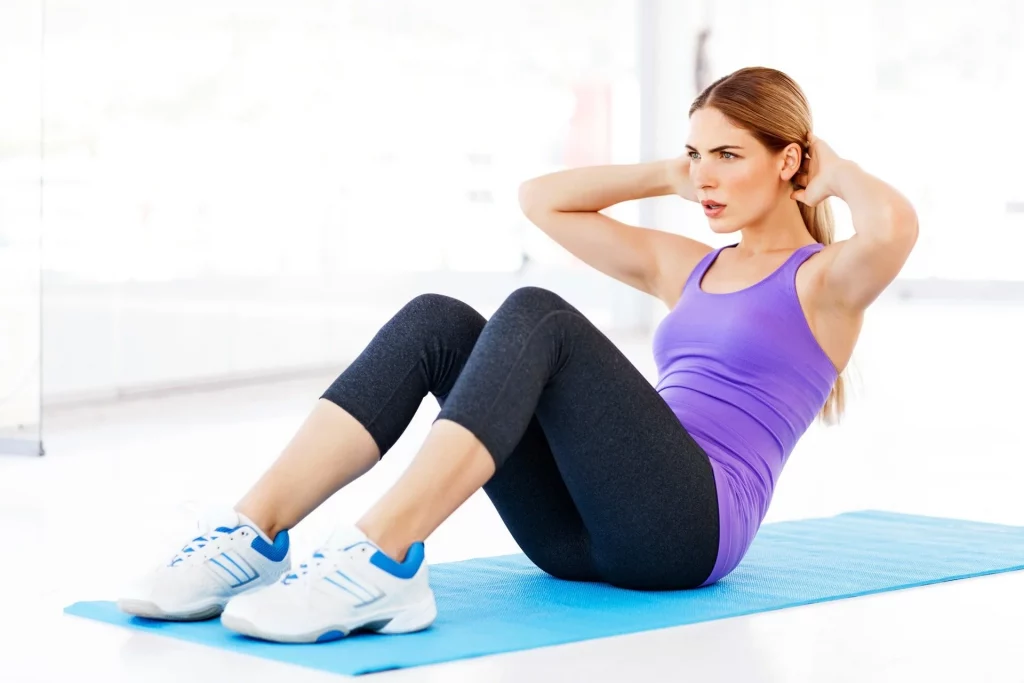
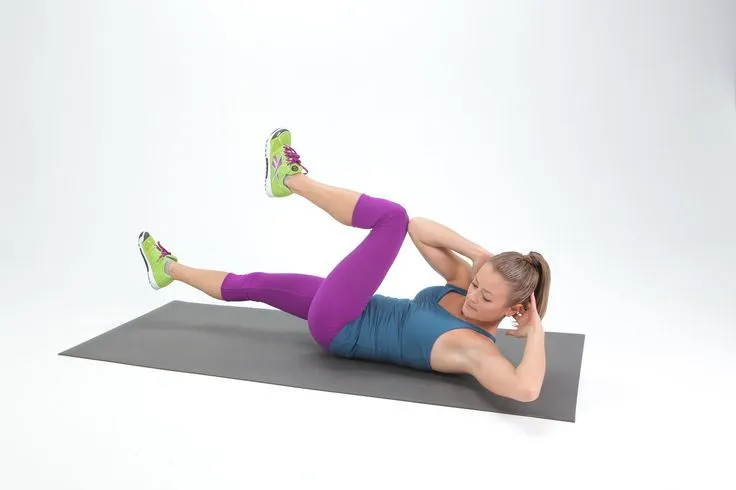
Twisting Sit-Up

To perform this exercise start by, sitting on the floor and lower your body back, hands behind your neck with the legs slightly bent at the knees.
Exhale and slowly lift the upper torso until it is peeled off the floor. At the same time, start moving one elbow toward the opposite knee. Hold for a second then do the opposite side then, slowly lower to the starting position and repeat.
Another variation of sit-ups. In Twisting Sit-Ups, the load falls mainly on the oblique abdominal muscles, as well as on your core which is used to stabilize you during the movement. To perform this exercise optimally make sure that you are squeezing your core every time you come to a standstill.
Angels and Devils
Start by laying flat on your stomach, then lift up your legs and arms upwards like you do in the superman plank, then slowly move your arms backwards, following a clock hand motion until you reach your buttocks with your hands, then proceed moving your hands up and over your back until you touch your scapulars. Then do the same motion backwards, that is one repetition.
The key here is to keep your whole core tight; this exercise really tests if you can be focused, maintaining ab flexion while doing a complex hand motion, this exercise is primevally a core exercises but it also works your gluteus and shoulders just like the superman plank.
Credit for this exercise goes to athlean-x
Side Crunch
To perform this exercise begin, by lying on your back on the floor or on an exercise mat with your knees and feet bent at 90 degrees, then place your hands (one on top of the other) behind the head of the neck support. Without pushing your head with your hands, tighten your abdominal muscles to lift your right arm off the ground and move it to the center of your body. Your body will be slightly turned to the left, proceed to hold the position for about 1-2 seconds and return to the starting position, do 2 sets of 10 repetitions and repeat with the left shoulder.
This variation of the crunch, a variation of the classic crunch, incorporates the obliques more than the lower abbs like the crunch does, it also puts a strain on your stabilizing muscles as the movements are asymmetrical.
Superman
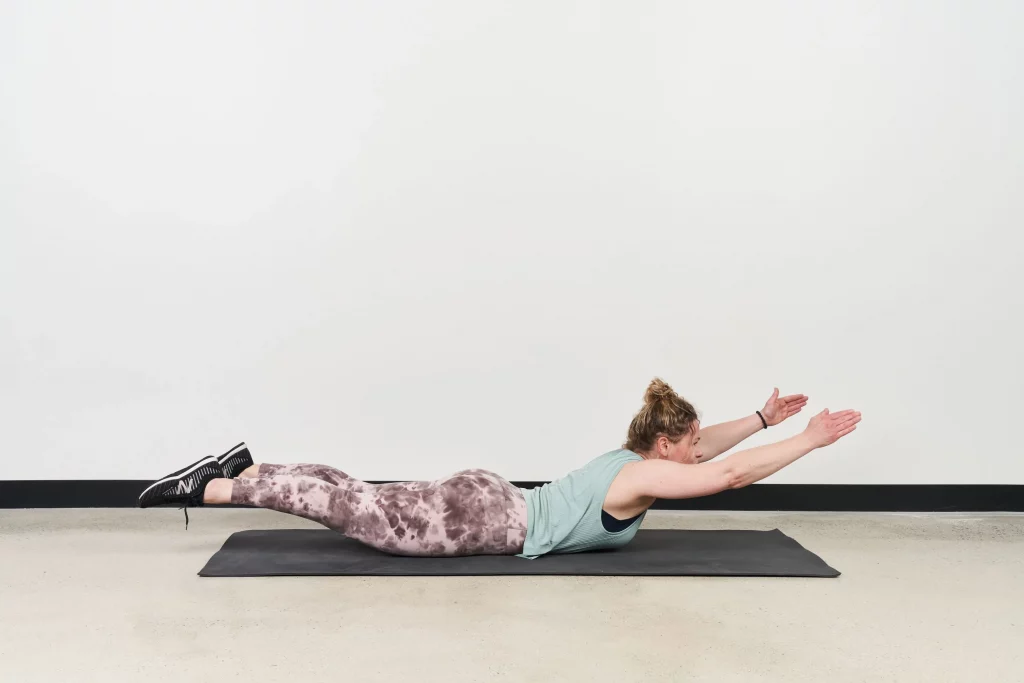
To perform the superman, lie on the floor or on a training mat, flat on your stomach with your arms and legs pointing forward, the toes and your whole sole should be pointing downwards, your arms should be shoulder-width apart with the palms facing downwards then proceed to lift both your arms and legs upwards, by using your shoulders and glutes, hold this position for a few seconds, then lower back down, then repeat the process, go back up, hold for a few seconds and go back down. You should do this variation for reps, unlike the superman hold.
This exercise is a real ab toning exercise, it puts constant on and off tension on your abs, it can really make you sweat, the main working muscles here Erector spinae, with the assistance of the gluteus muscles and the abdominals.
Superman Hold
Lie on the floor or on a training mat, flat on your stomach with your arms and legs pointing forward, the toes and your whole sole should be pointing downwards, your arms should be shoulder width apart with the palms facing downwards then proceed to lift both your arms and legs upwards, by using your shoulders and glutes, hold this position for as long as possible, then rest between sets.
Easier Version: An easier variant of this would be to only lift one arm and leg at a time. Proceed to lift your left arm and right leg at the same time, hold for 3-5 seconds, release, then do the same for your right arm and left leg. This version makes the exercise easier without sacrificing muscle tension.
Bird Dog
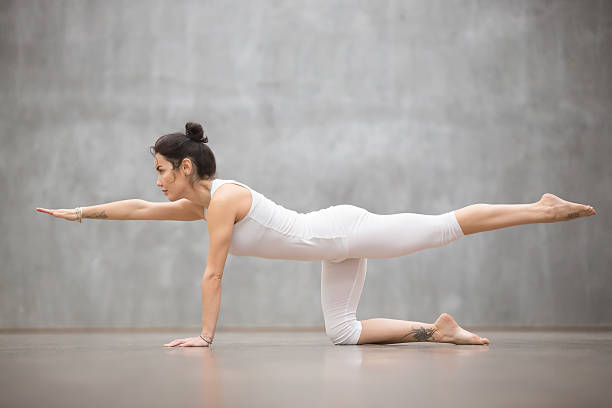
To perform the superman hold, lie on the floor or on a training mat, flat on your stomach with your arms and legs pointing forward, the toes and your whole sole should be pointing downwards, your arms should be shoulder width apart with the palms facing downwards then proceed to lift both your arms and legs upwards, by using your shoulders and glutes, hold this position for as long as possible, then rest between sets.
This exercise is a real ab toning machine, it puts constant on and off tension on your abs, it can really make you sweat, the main working muscles here Erector spinae, with the assistance of the gluteus muscles and the abdominals.
Dead Bug
Firstly, let your shoulders and lower back to lay onto the floor, then draw your shoulders down away from your ears, following that to get into the starting position, lift your hands so your elbows are above your shoulders with your fists facing in toward each other proceed by lifting your legs so your knees are directly over your hips when you exhale, slowly lower your right arm and left leg until they’re just above the floor then when inhaling, bring them back to the starting position. Repeat on the opposite side, that Is one rep.
It is advised to do this exercise on a soft surface in order to support your neck, place a folded towel or flat cushion under your shoulders during the exercise keep your hips and low back in a fixed position during the exercise. It is best to perform the movement slowly controlled, focus on engaging your core muscles and press your lower back into the floor.
Plank
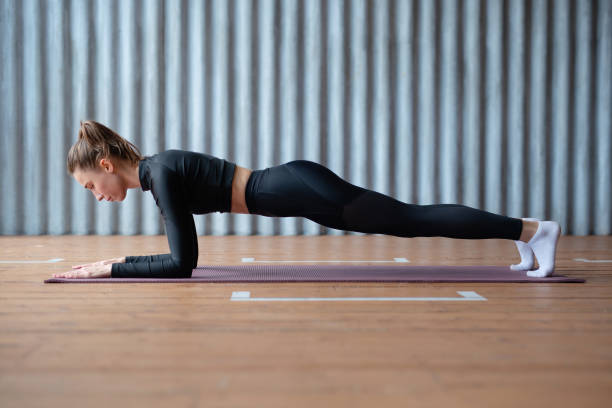
Stand on four limbs on the floor or a mat. Place your hands with the palms face down on the floor, below your shoulders. Stretch your arms. To avoid overloading the elbow joints, the elbows can be kept slightly bent. Stretch your legs. The legs should be side by side Straighten your back and hold your head as a continuation of your spine. Tighten the muscles of the buttocks, abdomen, and back. Lift the body so that it is in a straight line from head to toe.
The most common mistakes in this exercise are: Bending your back. You need to tighten your torso muscles to keep your back straight as possible. All the while, you should feel the tension in your abdominal muscles. You release your head. As you try to keep your back, hips, and buttocks in the correct position, you should not forget your neck and head as well. Think of them as a natural extension of your back. Focus your gaze on one point and hold it.
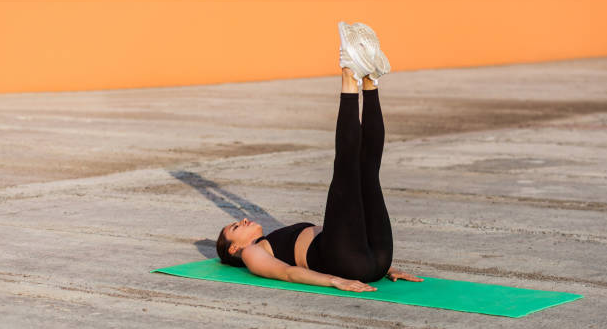
Reverse Corkscrew
To perform the Reverse Corkscrew, lie on your back with your arms by your side, palms facing downwards. Legs extended straight above your torso, perpendicular to the floor.
Then Start by bracing your core and moving your legs straight up then As you lift them at 90 degrees, press your arms into the floor and elevate your hips to bring your legs as high over your head in a twisting motion. Lower your hips and extend your legs back to the starting position.
This exercises primarily focus on your abdominals and obliques but also gets your buttocks, glutes and triceps working.
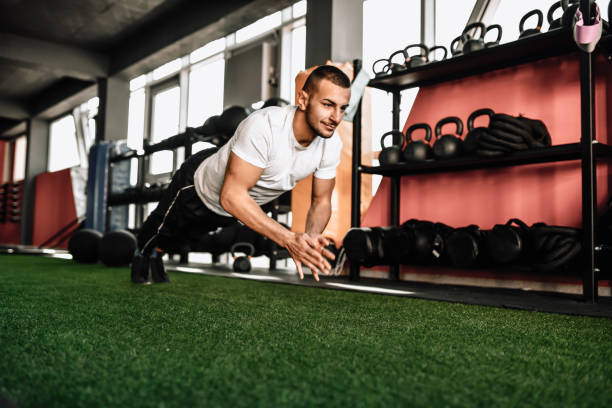
Black Widow Knee Slides
Start by positioning yourself into a hands and toes push up position, then proceed by bringing one of your knees upwards towards your chest. Move your knees upwards and curl your spine and contract your abs. Lower your knee and return it to the start position, repeat with the opposite knee, that is one rep.
The Primary muscle groups of this exercises are the Abs and Obliques, additionally this exercise utilized the Glutes & Hip Flexors, Quadriceps.
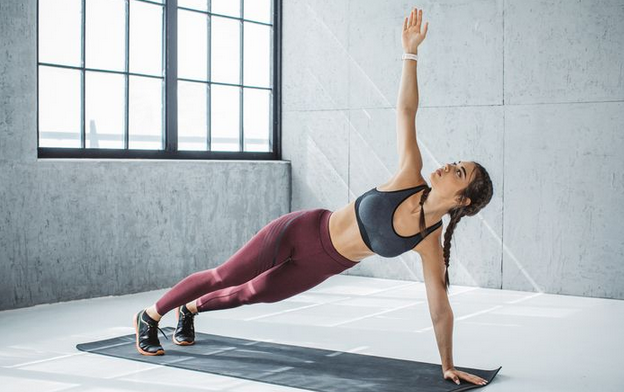
Side Plank
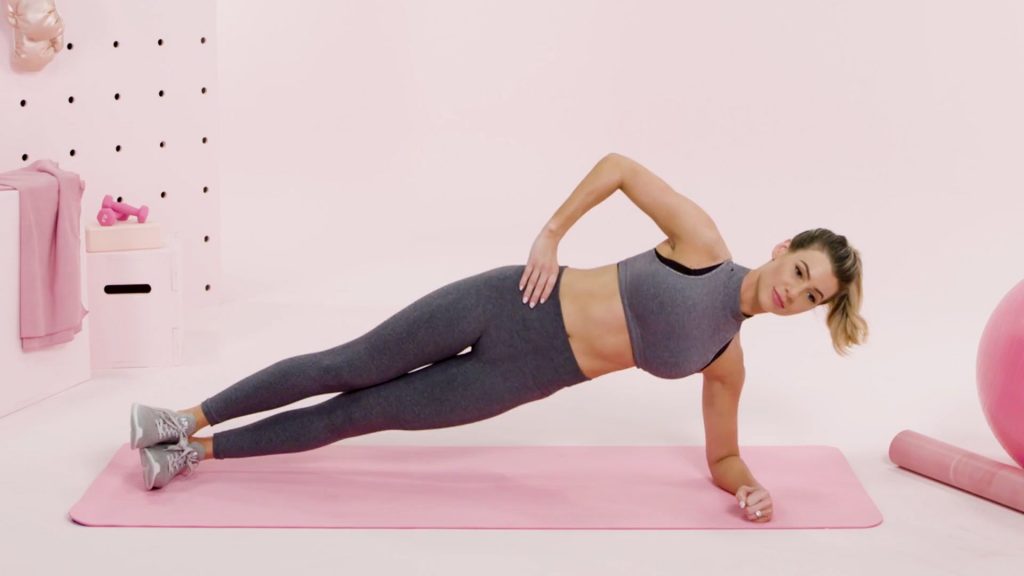
You start by lying on one side of your body with legs, one over the other, and you put your weight over your elbow so that your body. Lift the body so that it remains propped on the elbow with the arm and the lateral surface of the foot of the lower leg. Keep the opposite hand on your waist or leave it parallel. Keep your body in the same position as long as possible Then switch sides and repeat.
Arms-Elevated Side Plank
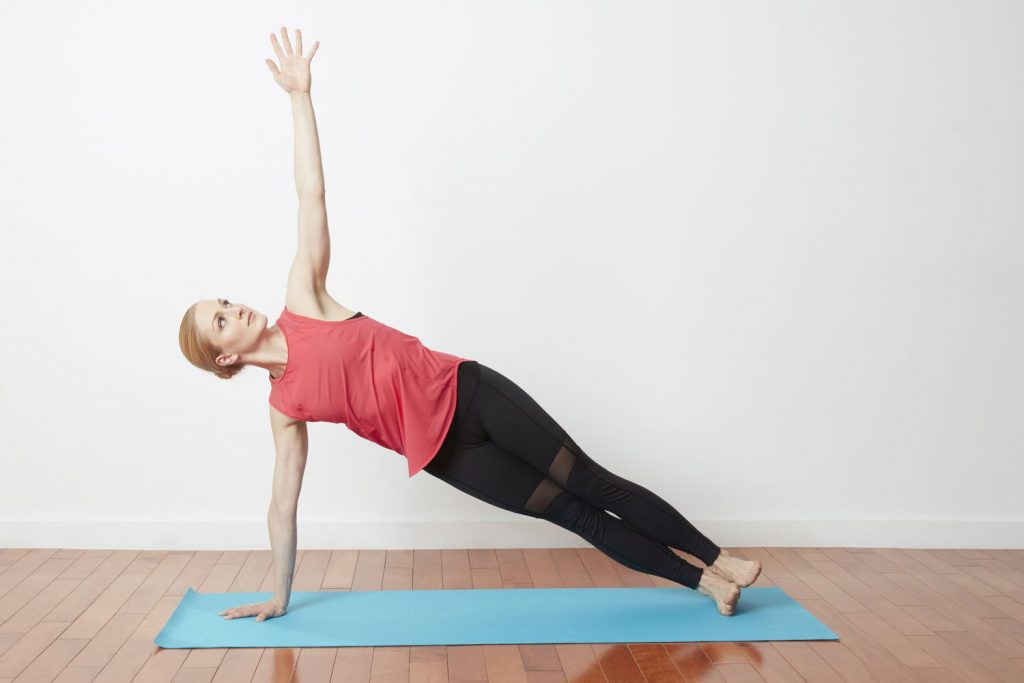
In this variation of the Side plank. Your arm is place on a higher surface than your feet thus making the exercise easier. Your body should be in one line, keep your abdominals flexed, the non-working arm is either at the waist or stretched upwards. The legs are one over the other, your pelvis should not sag downwards as This puts more strain on the lateral and internal muscles of the abs. after you assume this position focus on keeping your body straight and your core tight, hold this position for as long as possible, then stop and switch sides.
You should have two support points here, your legs and your arms. The supporting arm is stretched out. In this position, the main effort is to maintain balance, which makes you keep your muscles tight. The pelvis should not be lowered. This exercise hits all your abdominal muscles as well as utilizing your shoulders and glutes to keep balance.
C-Curve Hold
The C Curve is a pilates movement that of the spine that strengthens the deep abdominals while stretching the muscles of the back. The C Curve is a basic movement in Pilates that is used in many different exercises.
Side Bend
The Side bend is a lateral folding exercise and is one of the most popular oblique exercises. To get the most out it, Stand upright with your body straight feet shoulder-width apart and both hands behind your nape. Then Proceed to inhale and bend to one side with both your hands on your nape, keep your back straight and head up, when you reach your maximum extension hold the contraction there for a second, then exhale and return to the starting position, do one side first then after you are done move on to the other
Butterfly Sit-ups
Starting position: Lie on your back on the abdominal press pad or on the folded towel that is placed under your waist, then fold your soles together and move your knees as far apart as possible! Put your palms on top of one another and stretch your arms over your head, lightly touching the floor with your fingers! Exhale and perform a sit-up by straightening up your body, while lowering your arms and touching the tip of your toes! Return to the starting position and move on to the next repletion.
Lying Straight-Leg Raise
Lie on the floor on your back and place your hands sideways with your palms down on the floor or behind your back, placing them behind your back gives a little bit more support, so you can start like that if you are a beginner, then lift both legs at the same time, making sure that they are together throughout the movement and that the knee flexion is minimal.
Without pausing in the end position (reaching 90 degrees), slowly lower your feet to the starting point. The heels should not touch the floor throughout the exercise.
This exercises puts a lot of stress on the abdominal muscle while also utilizing your glutes, hip flexors and extensor.
Core Bodyweight Advanced Exercises
Frozen Fartleks
Perform a mountain climber. Now, every 3 seconds freeze. That’s it.
Crow Pose
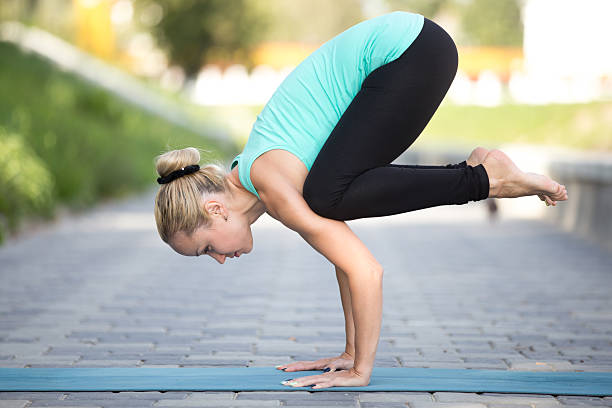
Put your hands in the ground, at around shoulder width, as you if you were preparing for a handstand. Then, keeping your feet on the floor, try to fit your knees into the top part of the arm, around the triceps area. Look to the floor and bring your body weight forward until your feet are suspended in the air. Hold for as long as you can.
Feet-Elevated Plank
Similarly to the Plank, Place your hands with the palms face down on the floor, below your shoulders. Stretch your arms. To avoid overloading the elbow joints, the elbows can be kept slightly bent. Then place your legs on an elevated surface at a comfortable hight Stretch your legs. The legs should be side by side Straighten your back and hold your head as a continuation of your spine. Tighten the muscles of the buttocks, abdomen, and back. Lift the body so that it is in a straight line from head to toe.
L sit leg raises
Sit in the floor, with your legs straight in front of you. Keep your back as straight as possible, forming a 90 degree angle with your legs. Put your hands next to your hips, or, if you are flexible and strong enough, slightly forward, as close as you can get to the knees. Then raise your legs as high as possible, and bring them back down. You should be able to raise them at least a few inches.
Back Widows
Firstly, Lie down on the floor with your hands raised parallel tyo your head and your legs brought together, then, raise your upper body up by pushing with your elbows, trying to bring you shoulder blades together. Exhale during this portion of the exercise. Hold this position for 2-3 seconds, then lower yourself back down until you’re lying flat on the floor. Inhale during this portion of the exercise.
Focus on keeping your core tight during the exercise. Try to lift yourself up just high enough to get a good back contraction. The elbow lift works the back muscles in general. This exercises is back exercises and uses nearly all back muscles, If you are struggling to do it on a carpet, try it on a more slippery surface.
L-sit
Sit in the floor, with your legs straight in front of you. Keep your back as straight as possible, forming a 90 degree angle with your legs. Put your hands next to your hips, or, if you are flexible and strong enough, slightly forward, as close as you can get to the knees. Then raise your legs as high as possible and hold for as long as possible. Aim to be a minimum of 3 inches from the floor.
Legs
Legs Bodyweight Beginner Exercises
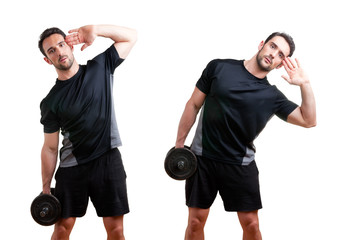
Calf-Raise
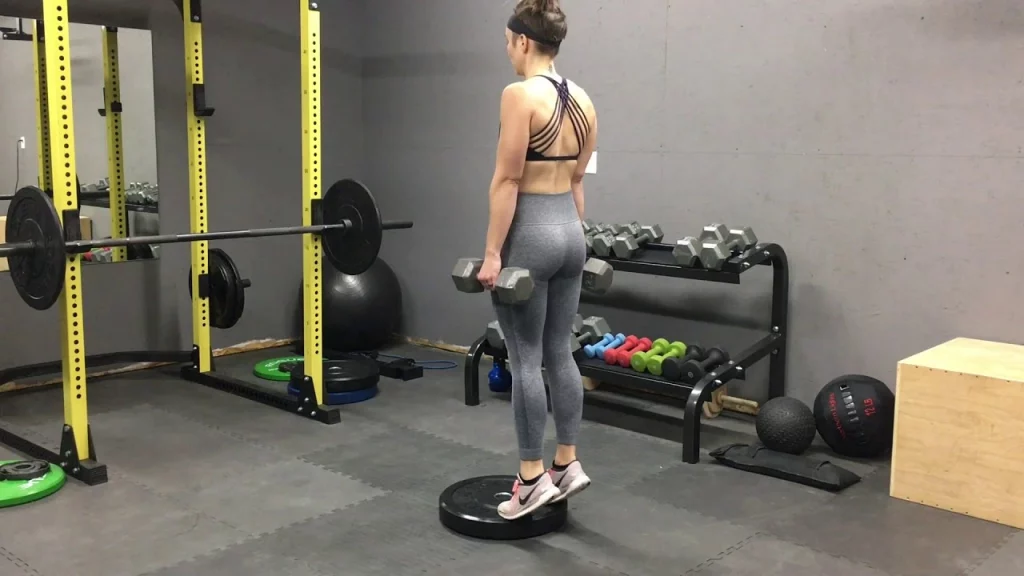
Feet at shoulder width, hands on the hips to keep stable, raise your body slowly lifting your heels until only the toes are and edges of the feet are in contact with the floor
Wall Sit
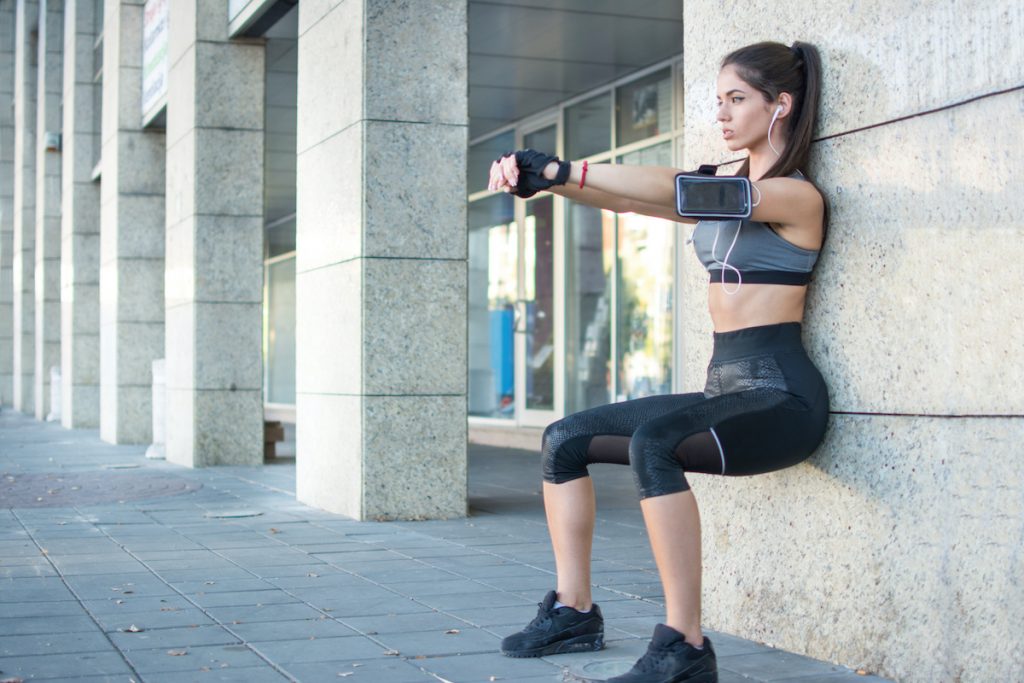
Start at squat position- legs at hip-width, at about 2 feet from the wall, squat against the wall and hold. Aim for 30 second reps, go closer to the wall to make exercise easier, and further away to make it harder.
Sumo Squat
Start with feet wider than shoulders- About 1 feet wider on each side. Then do a normal squats, reaching with your arms to the ground.
Air Squat
With the feet at shoulder width, keeping your back straight, do a normal squat.
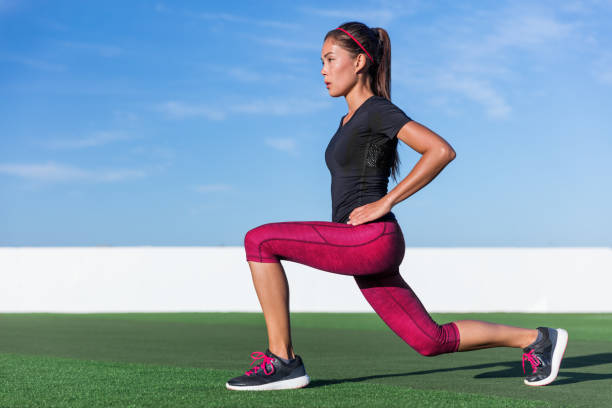
Static Lunge
Start with both feet parallel to each other, slightly closer than shoulder width, hands in the waist, take one step forward, about 3 feet (1 meter), and kneel until your leg forms a 90 degree angle without touching the floor, come back up to starting position, and repeat with the other leg.
Forward Lunge
Start with both feet parallel to each other, slightly closer than shoulder width, hands in waiste, take one step forward, about 3 feet (1 meter), and kneel until your leg forms a 90 degree angle without touching the floor, without touching the floor, advance your back leg forwards and repeat with other leg
Reverse Lunge
Start with both feet parallel to each other, then take a step back with your right leg. Kneel until the knee is about 1 feet or less to the ground, forming a 90 degree angle, and bring back the feet to parallel position. Repeat for left leg.
Lateral Lunge
Start with feet parallel at shoulder width. Take a 3 feet step to the right, and keeping your leg left straight, bend the right leg and bring your body down, keeping your back straight. Arms can stay in front of the chest.
Box Squat
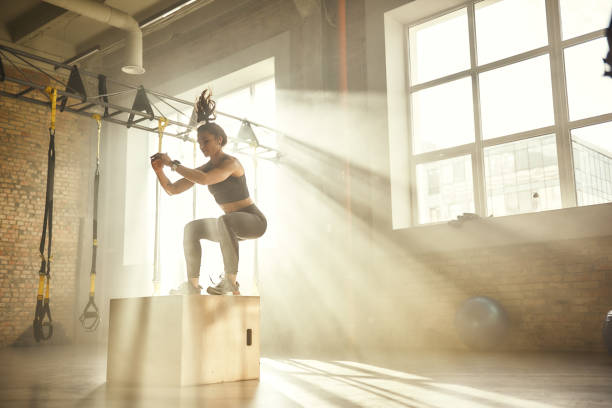
Get a box, chair, table, or couch, stand right in front with your back turned to said object. With your feet at shoulder width and keeping your back straight, bend the legs until you sit on the object
Glute Bridge
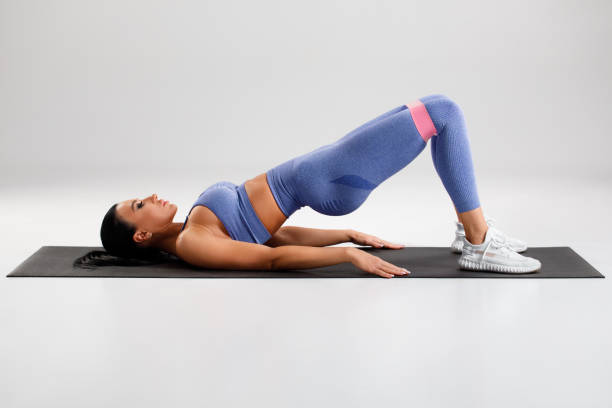
Lie on your back then, bend your legs and put all of your weight on your heels while Raising your toes slightly, (The position of the feet does not change throughout the exercises) then raise your pelvis as high as possible, balancing with arms stretched on the floor.
When you reach the highest point, hold for one second and begin lowering your pelvis. Make sure you tighten your buttons and glutes when you raise your body. The Gluteus Bridge is an exercise for shaping the butt and the back of the thighs, it can be performed with your own weight or with extra weight in the form of weighted disks.
There are several variants according to the position of the feet, as well as with only one or with both legs. In general, the exercise is appropriate for people who want to tone and strengthen the buttocks but want to avoid risky exercises such as hyperextension, back presses, and dead-straight legs.
Side Lying Clam
While lying on your side, stack your knees and legs and bend your legs at the knee at a 45-degree angle, then rest your head on your lower arm, and use your top arm to steady your frame, by putting it on your waist. Engage your bs by pulling them in from your belly, this will help stabilize your spine and pelvis.
Keep contact between your feet while raising your upper knee as high as possible without shifting your hips or pelvis. Don’t lift your lower leg off the floor. Stop, then lower your upper leg to the original position. Do the same for both sides. An exercise, commonly used in rehabilitation of lower back pain and hip injuries. The side-lying clam exercise can also be a great way to strengthen the hip abductors such as gluteus medius.
Legs Bodyweight Intermediate Exercises
Squat Calf-Raise
Start with the feet at hip width, raise your body lifting the heels. Hands stretched out to the front or on the hips for balance.
Heel Touch Squats
Start with your feet apart a little bit more than shoulder-width, hands up with palms forward and at shoulder level, then proceed to squat down low, touching your legs with your elbows and after you get up you take your right hand to your left heel, and the repeat but alternate sides.
This exercise is meant to be a warmup exercise that warms up and stretches your whole body, it heavily utilizes all your leg muscles. Focus on getting as low and then as high as you can slowly going faster and faster to warm up your whole body.
Single-Leg Calf-Raise
One leg straight, suspended in the air, the other leg does a normal calf-raise
Bulgarian Split Squat

Stand about 2 to 3 feet in front of a chair, table, or couch, with your back facing the chair, and set your righ foot elevated in the chair, table, or couch. Perform a squat, being the left leg, keepin your back straight and almost reaching the floor with your right knee
Donkey Kick
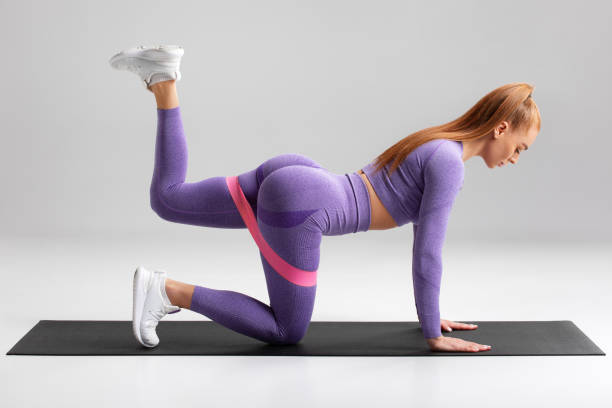
Stand on four legs with your knees below your hip joints and your palms just below your shoulders. Keep your knees bent at right angles and lift your leg until your thigh is parallel to the floor, this is your starting position. From here, tighten your buttocks and lift your leg as high as possible, slowly with this aims to maximise muscle tension.
All the while, try to keep your spine in a neutral position without twisting it unnecessarily. The amplitude of the movement is small, this should not bother you that you are not doing the exercise correctly. After performing the specified number of repetitions with one leg, rest the knee on the floor in the starting position and repeat the same with the other leg.
The load on this exercise is relatively small – just the weight of your foot. The Buttocks are the muscles that will be taking the brunt of the tension. Knee flexion reduces the involvement of the posterior femur.
Bent-Leg Donkey Kick
To perform the Bent-Leg Donkey Kick Assume the traditional Donkey Kick, starting position on all four limbs, knees hip-width apart, hands under your shoulders, with your neck and spine in the neutral position. Brace your core then proceed to start lifting your left leg, whilst keeping your knee bent, foot staying flat, and hinging at the hip. Using your glutes press your foot directly toward the ceiling and squeeze at the top.
Make sure that your pelvis and working hip stay pointed toward the ground, then return to the starting position and repeat.
This exercise mainly focuses on the leg muscles the mains ones being worked: gluteus maximus, gluteus medius.
Single-Leg Glute Bridge
Assume the glute bridge position, then straighten one leg. Perform the glute bridge as previously shown.
Shoulders-Elevated Hip Raise
To perform this exercise, lie on your back with both feet placed on the floor while your back is leaning against a higher surface, both legs should be bent at the knee.
Begin by, flexing your abs and tilt your pelvis backward so that your lower back is flattened against your hands or the floor. Maintain this posterior pelvic tilt throughout the exercise.
Push with your feet on the floor and thrust with your hips as high as you can without the use of your lower back, hold the top position and then slowly go back down and repeat.
This exercise mainly focuses on your glutes and lower back, it is a great way to tighten them, here you should focus on keeping your back straight in order to engage your glutes as much as possible.
Frog Pumps
Legs Bodyweight Advanced Exercises
Single Leg Wall Sit
Single-Leg Box Squat
Get a box, chair, table, or couch, stand right in front with your back turned to said object with one leg in the air. With your feet at shoulder width and keeping your back straight, bend the legs until you sit on the object, maintaining one leg in the air throughout the movement
Skater Squat
Skater Squat is a single leg squat knee tap variation that involves lifting one leg whilst standing on the other then squatting down on one leg and and lowering it on the descent until you touch the ground with your knee . It is similar to a Bulgarian split squat , but without touching the ground with the supporting foot.
This exercise engages the glutes heavily as well as the quads, while also improving your stability.
Shrimp Squat
Start in an upright position, then proceed to bend one knee and grab your sole behind your back, then slowly lower yourself down until your knee touches the ground, then stand back up. Use your free arm out in front to counter-balance the weight of your leg behind you. Lean your chest forward on the way up to keep from falling backwards.
Shrimp squats are like the bodyweight equivalent of the leg press, much more quad-dominant than the skater squat and pistol squat, which mainly focus on the glutes.
Pistol Squat
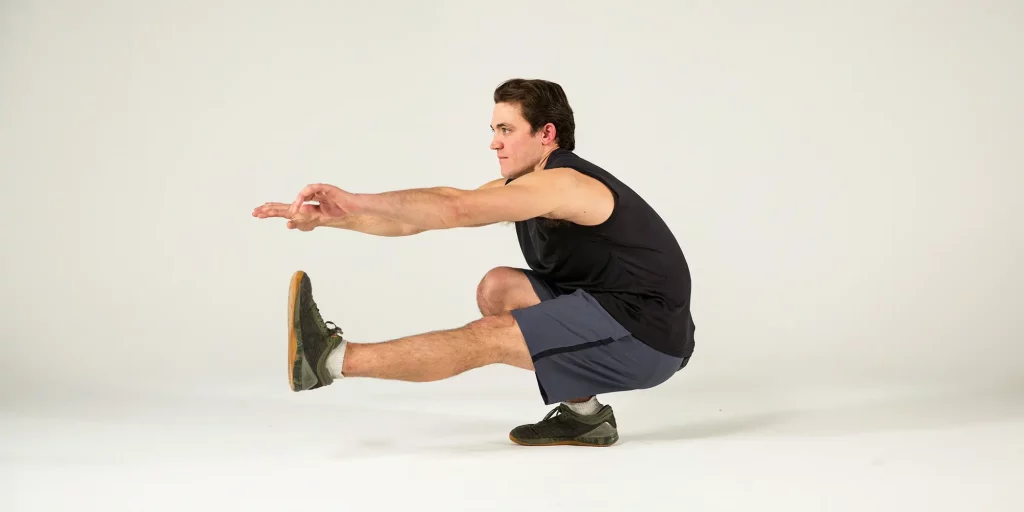
Start by standing straight on one foot, (the foot that will bear the brunt of this exercise). You lift your opposite foot straight forward Infront of your body in a 90 degree angle, or as close as possible; keep your arms straight forward in order to keep balance and then squat down at least to a 90 degree angle then straighten your body up without the free foot or any hand touching the floor. There are many variations possible, but this is the basic idea.
Single-Leg Romanian Deadlift
Start the movement by pushing your pelvis back, as a result of this push, your torso will start to bend. While bending, keep your arms as close as possible to the support leg and gently lift your hind leg back while holding it straight but not locked in the knee. The supporting leg also does not remain locked, but slightly folds into the knee, but try to keep the movement mainly in the pelvis. When you reach the ground or feel an average stretch in your back thigh, tighten your glutes and stand up to full extension of your pelvis.
Like all deadlifts this exercise utilizes muscles like the Buttocks, (Gluteus maximus);
Hind muscles (Semitendinosus, Semimembranosus, Biceps femoris); Femur muscles (Adductor magnus), whilst also testing your whole body’s stability,
Single-Leg Shoulders Elevated Hip Raise
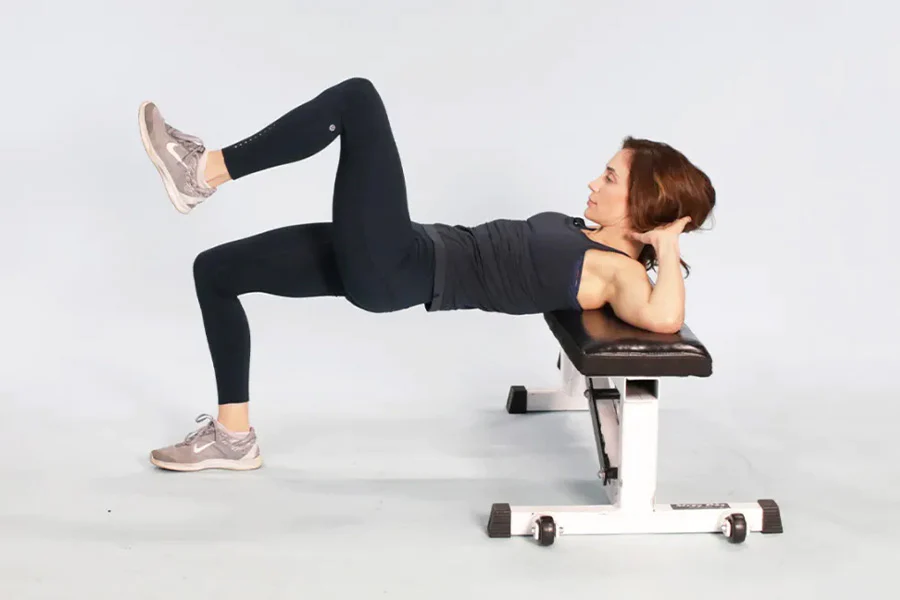
Rest your shoulders in a couch or chair with your feet in the ground, forming a 90 degree angle in the knees and keeping your back and upper legs in a straight line. Then raise one of your legs so that it aligns with the upper boddy in a straight line. Then lower the hips, almost reaching the floor, then bring them up back.
Long Leg Marches
Lay flat on your back, putting the weight on your shoulders while keeping your back straight without touching the ground, the legs should be bent at the knees, and the weight of your legs should be on your soles with the toes pointing up.
Then in this position, proceed to lift one leg upwards while maintaining the knee bent angle, keeping balance with your other leg, lower it back down in the same manner and then repeat with the other leg.
This Exercise really fires up your glutes as you maintain a glute bridge-esq position for the duration of the exercises, it also utilizes your hip flexors and extensors
Mobility
Mobility Bodyweight Beginner Exercises
Forward Traveling Ape
Crouch down to a squat position, position your hands on the floor in front of you inside the legs, put your weight into your hands and elevate your body, bringing it frowards. Move around the room in this manner, from one side to the other.
Side-Traveling Ape
Crouch down to a squat position, position your hands on the floor, with the left hand to the right of the right leg and the right hand even further to the right, put your weight into your hands and elevate your body, bringing it to the right. Move around the room in this manner, from one side to the other.
Upper Body
Upper Body Bodyweight Beginner Exercises
Wall Push-Up
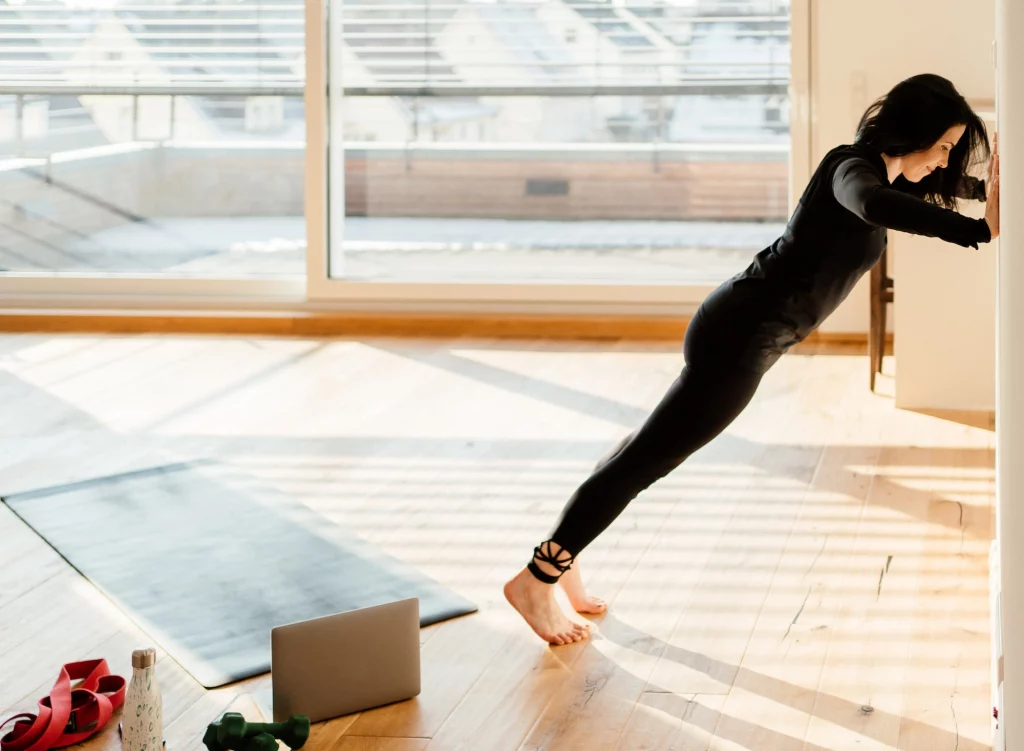
In the Beginning you won’t be able to do a conventional push up, so here is the alternative, Wall push-ups, here is how you can do them.
For this exercise we are going to utilize a wall, stand in front of the surface (about a meter away), rest your hands directly in front of you on the wall. Lean against the wall with your hands (make sure your feet do not slip) and push against the wall until your hands are fully extended, then proceed to lower down as much as you can, then go back to the starting position.
This exercise works mainly on your pecs, but also puts a strain on your upper shoulder, forearms and wrists.
Doorway Row
While holding a door frame around chest height, lower your body back, holding yourself up in a straight line ( head to toe) Pull yourself towards the door. Repeat
As all types of Rows, this one as well is a pulling exercise, pulling exercises work nearly all back muscles in general, but these types of back exercises mainly focus on the lats (latissimus dorsi). Additionally, it puts pressure on the forearm muscles and the upper arm muscles, like the biceps and triceps which are dynamic stabilizers for this exercise.
Bench Dip
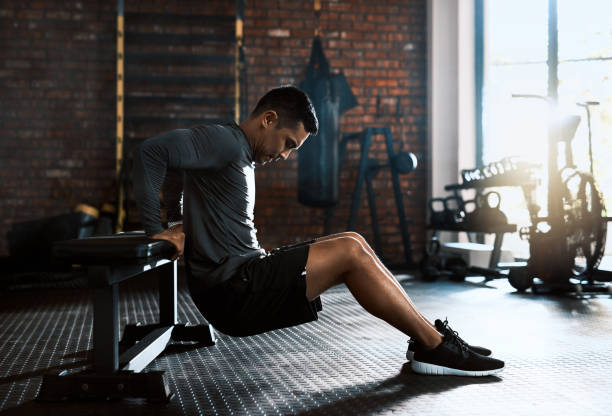
Bench dips are a pushing multi-purpose exercise that has a wide base application in beginner training programs.
Sit on a elevated surface and support your body with your palms finger facing outwards. Place the feet on the floor pelvis width. Extend your arms and move your body slightly forward, tighten the muscles on your back, pulling your shoulders back.
Relax downwards at a moderate speed until your elbows are at 90 degree angle.
While lowering, keep your spine upright and do not push your elbows back.
Reset and repeat.
For this exercise be sure to warm up your shoulders and shoulder belt before embarking on a bench.Try not to move your body left and right and keep your spine as straight as possible. To fully load your triceps, position them on or near shoulder width. Do not fully stretch your arms in the up position. Doing so will overload your elbows as well as lower your triceps. Keep your elbows pointed all the way back and your arms close to your body. This will load your triceps without loading your shoulder and chest muscles.
Door Pull-ins
Upper Body Bodyweight Intermediate Exercises
Sliding Pull Downs
To perform this exercise, start by laying on a smooth surface then proceed to, hold onto something for grip on your hands, like shoes, for example, preferably something with resistance, then, you simply perform a lat pulldown motion by pulling your elbows down to slide your body upwards by using your lats.
This exercise Is a great bodyweight alternative of the Lat pulldown, it will help you develop your back muscles, especially your lats and upper back, it also, uses a lot of your shoulder muscles.
Power Push Aways
Start in a pushup, planking position, then get your hips all the way back until your arms are totally straight and extended, now let your head come in between your palms as you bend your elbows at a 90 degree angle, then proceed to go back up by pressing up from your palm just like in a pushup but focus on getting back to the straight arms legs bent position, this is one repetition.
This exercise Is a killer shoulder exercise it puts a lot of stress on your shoulders. They are the main muscle in this exercise but the glutes, biceps, and triceps all play a role in this exercise.
Elevated Tricep Extensions
For this version of the tricep extension exercise, you’ll start out in a position similar to a regular push-up, but with your arms place on a higher surface and fully extended in from of your body. Then as you bend your elbows, slowly lower your body until your elbows touch comes to a 90 degree angle.
This exercise Is a great alternative to the regular triceps extension, it also puts a lot of strain on the triceps shoulder and forearm muscles.
Plank up-down
Start in a plank position, then move into a lower plank position.
Crab Walk
The Crab Walk is an upper body and core exercise that utilizes your body weight for resistance. In order to learn how to do the crab walk will help you lose fat and tone your back, arms, shoulders, core, legs, and hamstrings! At first, this movement will feel really weird, but with some practice, you will get it down.
Your start in a seated position on the floor with your feet hip-distance apart in front of you and your arms behind your back with fingers facing towards your hips, then proceed by lifting your hips off the floor and tighten your abdominals, then begin moving forward by moving your right hand then followed by your left foot, and then your left hand followed by your right foot. The crab walk focuses on a few different muscles, including the triceps, your shoulders, abdominals, and quads.
In order to perform the exercises perfectly, make sure to follow these tips: keep your palms on the floor behind your buttocks, your feet should be set apart and your abdominals engaged to keep your back straight and safe. Be cautious, do not let your feet move too fast for your upper body so as this can injure your shoulders.
Inchworm
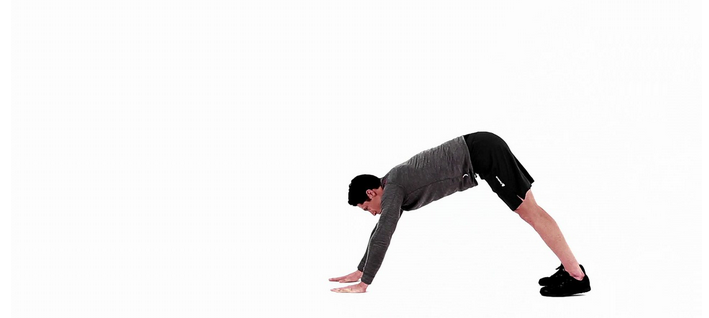
For this exercise, you need to start upright on your feet, then proceed to hinge from your hips, place your hands in front of your feet, and move them forward one after the other, as far as you can, until you reach an extended plank position, which you need to hold for a few seconds. Then walk your hands back, until you reach your toes, then repeat the exercises again.
This exercise is a great way to warm up your core, it puts a lot of tension on your core while you are holding it while utilizing the shoulders when you are doing the hand “walk”. To get the most out of it, when you are holding the extended plank position, squeeze your abdominals.
Mountain Climber
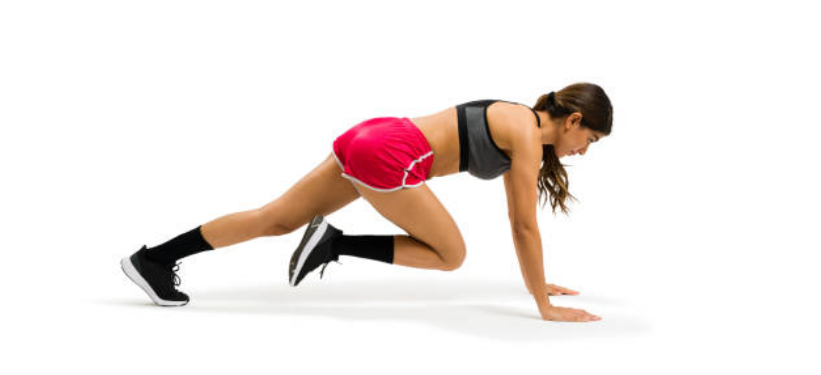
A mountain climber is an excellent exercise that puts a load on the entire body. Mainly working the muscles of the buttocks, thigh muscles (quadriceps and back) and oblique abdominal muscles. The abdominal muscles, back muscles, calves, and many others help in stabilizing the movement.
Take a position the classic plank position, meaning, stand on all four limbs on the floor and place your palms under your shoulders (fingers pointing forwards). Stretch your arms until they are straight in order to avoid overloading the elbow joints, the elbows can be kept slightly bent. Gather your feet side by side, stretch them, and rest your feet on the floor, putting the weight on your toes. Straighten your back, gather your shoulder blades together, and hold your head as a continuation of your spine. Tighten the muscles of the buttocks, abdomen and back. Lift the body so that it is in a straight line from head to toe. You can lift the pelvis a little more – so that the torso is almost parallel to the floor.
Without relaxing your muscles, bend one leg and lift your knee to your chest, but do not step on the floor. Here are two ways to do the exercise:
The easiest way is to perform the movement is with one foot while the other one remains in the starting position on the floor. This method is initially used to teach movement. The forward leg is held to the chest for a moment to stretch the muscles well. Then you pull it back to the starting position and do the same with the other leg.
You can perform the set number of repetitions and then alternate the legs and repeat the same by moving the other leg forward. It is better to perform the exercise with alternating legs. With one repetition, you move one leg forward, the next the other. This slows the appearance of fatigue and allows you to perform more repetitions.
Torso-Elevated Push-Up
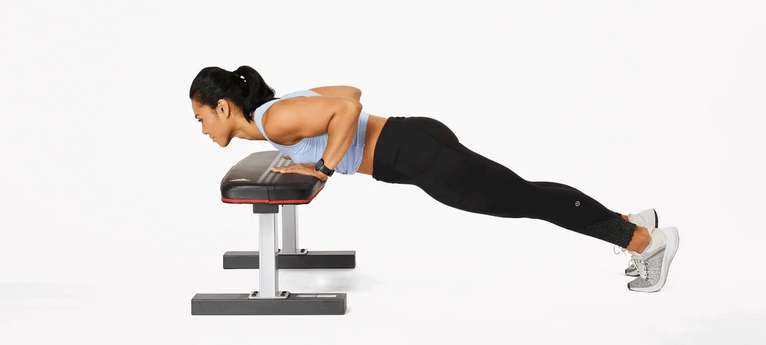
This type of push up is very similar to the classic variant, but with a twist, instead of placing your hands and feet on a parallel level, you need to place your hands on an elevated surface, this type of pushup is generally used as a supplement of the regular one when learning the conventional push up.
So here is how to do it: Find an elevated surface, and place your hands palms down on it, hands should be close to the body, elbows should not be flared too far out, feet together, core tight. Then go down, until your elbows are at a 90 degree angle or until your chest is touching the surface, then slowly go up, this is one rep.
This exercise uses all the muscles that are used in a classic push up, but the load on them is lessened, these include: Rectus abdominis, Obliques, Erector spinae, Biceps brachii, Latissimus dorsi.
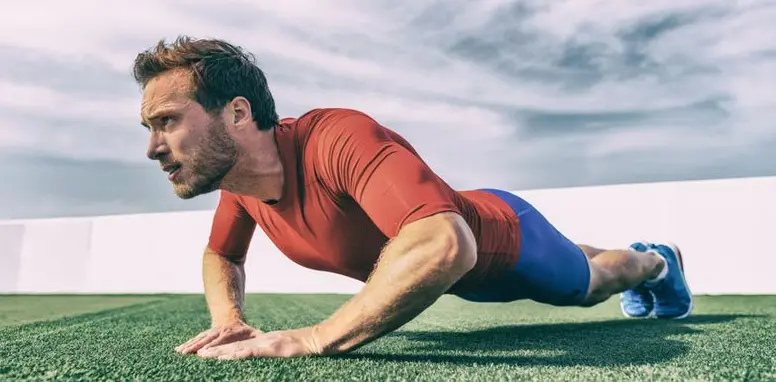
Push-Up
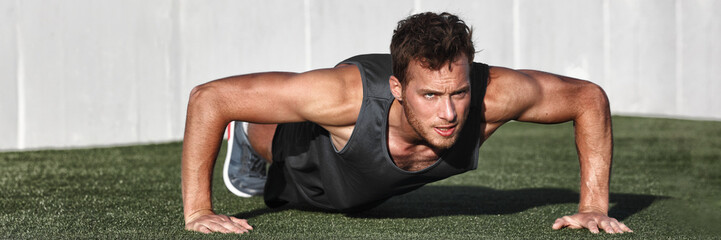
Start by facing the floor, with your arms are by your side, palms placed slightly in front of the shoulders, the fingers are open and pointing forwards. Heels together and head slightly forward. Your body should be straight.
Then, lower down until upper arms are parallel to the floor at a 90 degree angle, then Push up from your palms keeping your arms close to your body, push until your arms are straight at the elbow. Lower at an explosive but controlled speed. On descent, you inhale and, when pushed, you exhale.
Keep your body upright and your feet close to each other. Your head should also be upright, not down. The Movement should only take place in the hands. Do not move your waist, knees, or pelvis. Relax while your chest touches the ground.
Push-Back
Shoulder exercise
Upper Body Bodyweight Advanced Exercises
Clapping Push-Up
To perform them you will need to generate as much power as possible in a minimum of time. So fast and so strong that you separate from the ground. However, history knows not one or two cases of broken noses, and you do not want this to happen.
So, just take a starting position for the push up, lower yourself to the floor in a controlled manner, and then explode in the air literally by pressing upwards as hard as possible then bring your hands together whilst in mid air. Keep the landing as soft as possible (with bent but ready to take contact elbows). Focus not so much on the number, but on the technique and achieving the fastest and highest repulsion. If you feel your speed is slowing down, stop the exercise.
This exercise really burns your chest and triceps, explosive movements tend to utilize a lot more strength than regular ones thus tiring you out faster.
Flying Superman Push-Up
Perform an explosive push-up, propelling yourself into the air and extending the arms in front of you whilst in the air. Great to improve explosive strenght.
Rotational Push Up
The Rotational Push-up is a functional training exercise that combines: pushing, pulling, and rotation.It works the chest muscles, anterior deltoid, and triceps while demanding the stabilization strength of both shoulder blades and spine, with the torsion performed, it intensifies the work on the core, abdominal muscles, mainly the abdominal oblique
Start with In a pushup position, parallel to the floor, and bring the torso closer to the ground by bending your elbows Elbows facing outwards, then torso should be brought down as close to the ground as possible without contact. Shoulder blades should remain stable, and armpits and chest should also distribute strength Push the palms firmly against the floor to push back upwards and straighten the arms. Rotate your torso, from the pelvis up, raising one arm towards the ceiling and ending the movement in a stable T position. Go back down and repeat for the opposite side
Cobra Push-up
To perform this exercise, start in the starting position for a classic push-up. Your legs should be slightly wider than shoulder level next you move your arms back so that your posture is an “”L”” shape. The arms should be at shoulder width. The legs, back and arms are tight and should be kept straight. Your head should be head in a neutral position toward the floor.
Next you move the torso so that your knees and elbows almost touch the floor, then as you continue to lift the body, you start to exhale, then inhale and return to the starting position through mirror movement, that is one repetition. This exercise will help you develop your pectoral muscles as well as your shoulders, it also uses your forearm and triceps muscles.
Spiderman Push-Up
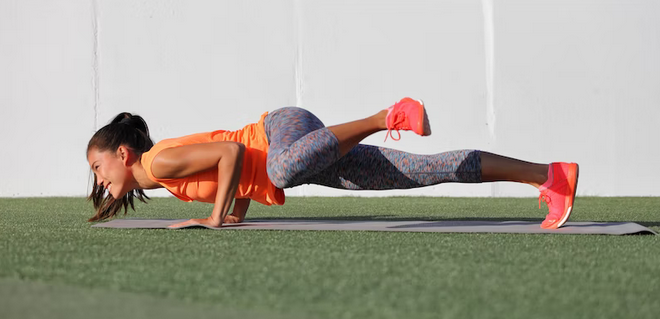
Get on your knees floor and place your hands Infront. Stretch your body and legs back. In the starting position, the arms should be extended below the shoulders, fingers pointing forward. Straighten your back, and tighten your back and abdominal muscles. Make sure that your is in a straight line from head to toe. This is how you should keep it throughout the exercise.
Inhale and slowly lower the body downwards. The elbows should then flare outwards. If you move them close to the body, most of the load will be absorbed by the triceps and, accordingly, the chest will benefit less. Simultaneously with the lowering, bend the knee and the hip on one of your legs, lift it into the air and move it forwards. Try to touch the elbow of the working hand with your knee, or at least bring it closer to your elbow. In this position, hold for a second. Exhale slowly returning to the starting position. Repeat with the other leg
The Spiderman pushup utilizes the entire body. It primarily loads the chest and triceps, but at the same time engages the muscles in the abdomen, back and legs. In addition, completing the exercise requires a constant balance – something that makes each repetition as challenging and difficult as possible.
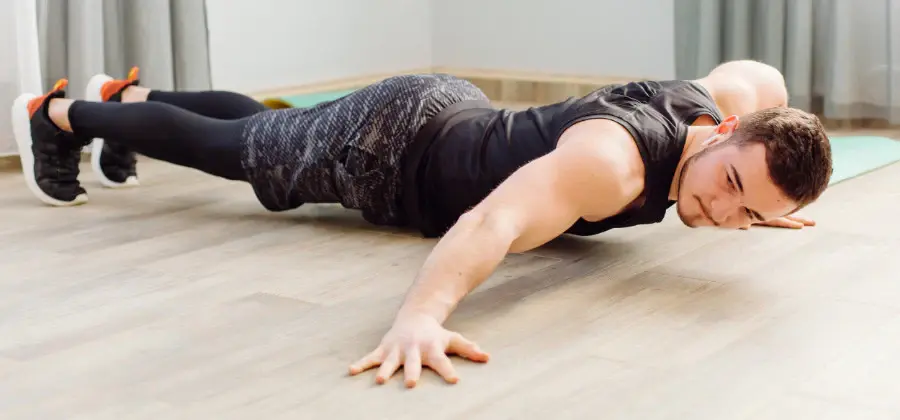
Triceps Extension
This exercise is a version of a push-up modified to focus a lot more on the triceps, Start in a position similar to a conventional push-up, palms face down, but what you do here is you, lie down on your forearm, your shoulders should be in line with your biceps. From here on, what you do is, apply pressure from your palms to the ground, and your whole arm should start to lift, once you reach full extension, start lowering down, As you bend your elbows, you’ll slowly lower your body until your elbows touch the ground.
You’ll be amazed at how much strength this requires from your triceps it is a killer single-joint movement. One of the main points here is to squeeze your core tightly, engaging your whole body to take this exercise to a whole new level.
Feet-Elevated Push-Up
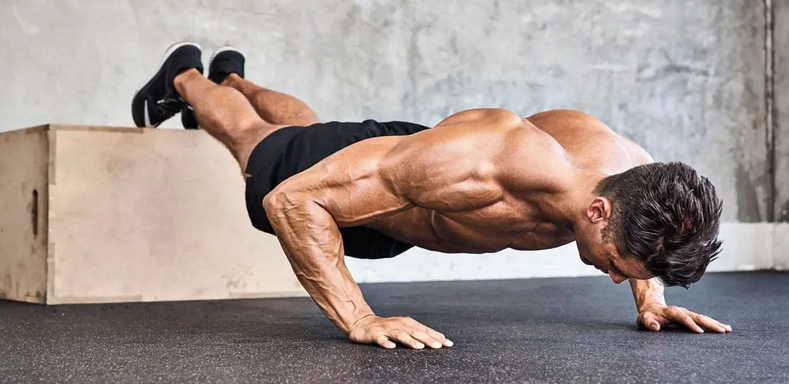
Тhis is a variation of the classic pushup, makes the exercise harder, by shifting a big percentage of your weight from your legs to your arms.
You start by placing your feet on an elevated surface and assuming a plank position hands under the shoulder, feet together and straight. Lower down slowly until your arm comes to least 90 degrees. Then Come back up by pushing explosively from your palms.
This exercises mainly targets the pectoral muscles as well as the biceps, triceps and shoulder, in this position the strain on the shoulders is much heavier.
Doorway one arm row
Tuck Planche
The planche is a horizontal arm hold, most commonly performed in gymnastics and street fitness. It practically activates the muscles of the entire body, with this position loading more the shoulder rotators, the front serrated muscle (seratus) and the trapezius muscle. A tucked planche is the easiest version of the planche with support only on the hands. The legs are bent and close to the body, which makes balancing easier. This is the starting point for more complex progressions of the Planche.
Stand in a crouched position on your toes. To assume the starting position, the legs are bent at the knees and side by side then Stretch your arms forward, bend over and place your palms with your arms outstretched onto the ground at shoulder-width apart, fingers open, middle fingers pointing forward, and palm firmly in the ground. Lower the shoulders down with the shoulder blades (moving the blades away from each other and rounding them forward).
Keeping your arms straight, move your body forward until your palms are below the waistline. Stabilize the body. Carefully lift your toes off the floor bringing them close to your chest (first one leg and then the other leg).
The key to the technique of this exercise is to find your center of gravity. The key to balance this position is using your fingers by pushing with them if you are going forwards and pushing with the palms if you are going backwards.
Single leg tuck planche
Single leg tucked planch is a follow up of the turcked planche. It is meant to be as something of a continuation of your planche progression.
To perform this move, start by getting into the tucked planche and starting to extend you legs out, when you get just under your furthest point, take one leg right out as straight as possible and squeeze it as solid as you can.
This will build up your whole body as with all planche exercises, be sure to not overestimate your level and begin with the proper planche progression.
Hindu Push-Up
Get on the floor on your knees and palms, place your palms shoulder width apart or at most spanwise, then place your knees on the hip joint (below them) but one inch in the sides. Lift up on your supporting limbs, stretch your legs, straighten your spin. Your toes should be at least a foot away from the position of your palms.
Seen from the sides the correct position looks like a slightly tilted “”L”” shape.
To actually preform the exercise, from said position, lower your shoulders in a straight line to your wrists without twisting your spine, then shortly before the shoulders touch the wrists, slide your body forward and when your elbows are close to your wrists, push your body upwards, carrying the weight forward. Unlike the push-up, the spine here curves downwards towards the ground so that a nice arc is formed and the head looks forwards instead of downwards;
Diamond Push-Up
Assume the push-up position. Then place your hands just below the chest, as they are contracted side by side. The shape they form resembles a diamond- That’s where the name of the exercise comes from.
This is our starting position, then you descend slowly by inhaling.
The chest and arms should almost touch each other, then slowly lift the body as we exhale and lastly, we return to the starting position.
Diamond push-ups look a lot like conventional push-ups but with a small adjustment. The difference is in the position of the hands – the thumb and index finger are in contact with each other, forming the shape of an inverted diamond. As a result of this adjustment, the elbows are wider at the side, increasing the load on the triceps while making the pectoral and deltoid muscles are less involved.
Wide Push-Ups
Feet elevated variation to make it harder
Side-To-Side Push-Up (Archer Push Up)
To perform this type of push up Start in the traditional push-up position with your hands double the width of your shoulders and toes on the floor, then proceed to squeeze your core and raise your hips so that your body forms a straight line from head to toe. Then, shift your weight on one of your arms, while maintaining balance with the opposite hand, the push up from the main hand until you are in the starting position and do the same with the opposite arm.
This variation of the push up is a great way of increasing the difficulty this increases the strain on the muscles of your chest, shoulders, and triceps which are working harder to support, your body weight up and down and from left to right, while your core muscles need to be fully engaged to keep your torso level for the duration of each rep. In this Variation the depth of the push up is key, the deeper you go the more strain will be put on your muscle.
One arm door pull-ins
Feet-Elevated Pike Push-Up
Start by positioning your hands on the ground shoulder-width apart, with your rear in the air and feet firmly on an elevated surface like a chair or on your bed, your arms should be overhead, in front of your head, if you need it, feel free to bend your knees if you cant do the exercise with straight legs. The main tips here are, firstly, your elbows should stay in line with your hands during the exercise, don’t let them spread out doing this will increase focus on your triceps, as well as keeping your shoulder joint stable. Do every rep with a full range of motion, all the way down until your head touches the floor, and all the way up, and finally don’t forget to keep your body straight.
Assisted One-Arm Push-Up
The Assisted One Arm Push Up is the ultimate progression towards the one arm pushup, so here is how you can do it, firstly begin by standing in a default pushup position, but the twist here is that one of the arms will be put double shoulder width on a elevated surface. Thus increasing the load on the opposite arm, so when you are in this position, slowly lower down onto the main arm while maintaining your weight on top of It, go as deep as possible, but not so much as to cause discomfort. Then push up until you have straightened your main arm and repeat.
This exercise will use your pectoral muscles, as well as testing your shoulder strength and stability, make sure to do reps with both your hands as to prevent muscle imbalances.
Wall Handstand Push-Up
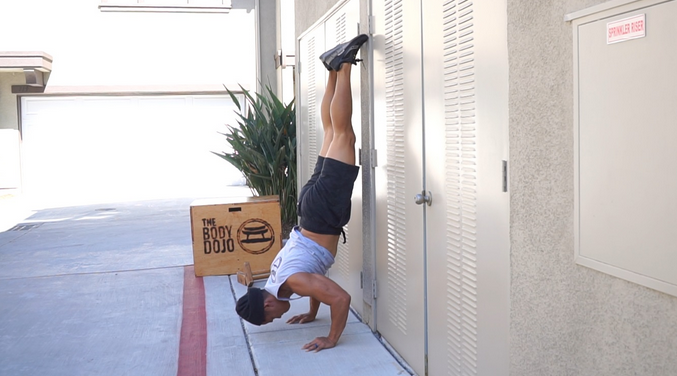
The Handstand push-up is easily one of the most famous and most sought calisthenics moves, but not everyone can do a handstand push up right of the bat, here is how you can practice them, whilst taking out the balance element out of it. Here is how to do a Wall Handstand Push-Up:
Begin by facing a wall in a standing position, then proceed by kicking your feet up so you’re in a handstand position against the wall. Squeeze your abs, glutes and thigh muscles.
Lower yourself toward the ground as far as possible, by slowing bending your elbows whilst making sure that your body isn’t bending, push back up by putting pressure from your palms onto the ground, and repeat.
The Handstand push up and its variations build incredible shoulder and upper body strength
While additionally strengthening the core and glute muscles that help you stabilize the position.
One-Arm Push-Up
Let me start of by saying that, this exercise is not recommended for beginner fitness enthusiasts. Obviously, to resort to this variant of push-ups, you need to master the technique of classic push-pulls.
To perform this exercise, start in a plank position, placing your feet more than shoulder-width apart (the better your balance and coordination, the higher the distance between your legs). Tighten your abdomen and make sure your spine is in a neutral position;
Place one hand (the working hand) under the chest and place the other behind the body;
Begin to bend your elbow and lower your body, lowering your elbow slightly and rotating it from the torso; As with the standard two-handed pushup, a full range of motion is required here, i. at least 90-degree flexion in the lacrimal joint measured on its outer surface;
Start the upward movement by pushing and simultaneously rotating the arm to move it off the ground as you return the body to its starting position.
This exercise puts a lot of strain on the Pectoralis major, Deltoideus, Anterior whilst using the obliques, triceps and core for stability.
Frog Stand
A Classic gymnastics move, it will strengthen your whole shoulders as well as your core, also develops killer finger and palm strength. But how can you do it Squat down, knees bent and apart sideways beyond shoulder width, feet far apart, proceed to Stretch your arms forward so that your upper body is at the inside of your thighs. Fold your elbows at a 90-degree angle and place your palms on the ground shoulder-width apart with your fingers open, middle fingers pointing forward and palm firmly in the ground.
The upper part of the hands is at the level of the shins. Raise your hips higher while keeping your elbows bent and slightly forward. The knees are parallel to one another (between the armpits and elbows), aiming to place them as high as possible. Squeeze the inside of your thighs in with your handsTake your body weight forward and lift yourself off of your toes. The weight of the body should be on the upper arms. The elbows are above the wrists. Lift one foot off the ground. For one thing, you can keep one foot in the air, then change your legs. If you feel ready, try lifting both feet off the ground.
Uneven arm push up
Take a push-up position with arms shoulder-width apart. Set Your feet one next to the other, your back flat, and your eyes focused on the floor. Place one of your hands on a slightly higher surface than the other.
Then, bend your elbows and get to the floor in an explosive manner. When your chest is a few inches apart, push back up as quickly and explosively as possible from the floor. Then straighten your arms to get back to the top position.
Uneven push-ups are a great way to improve stability and train the upper body. It is a harder version of the regural push up.Your Shoulders will have a deeper range of motion giving them a challenge to widen the muscle.The Pectoralis Major, Serratus Anterior, Deltoids are the muscles to be benefited with this exercise.
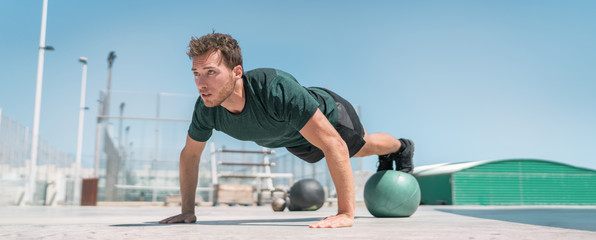
Single Leg Push Up
The single-leg push up is a harder variation of the classic push up. To perform this movement the key is to balance from your feet up through to your head.
Start in the plank position with your hands directly under your shoulders with your feet and hips distanced apart then proceed to lift one foot into the air.Then start to lower down and as you lower your body towards the ground, point your elbows sideways. Then once you have reached your maximum depth, exhale and press up thus lifting yourself into the starting position. Make sure to alternate legs in between sets.
Headstand
Get down on your knees, bring your fingers together and place your forearms on the floor or a mat, with your elbows shoulder width apart. Put the top of your head on the mat.
Inhale and lift your knees from the floor, gently approaching your elbows! Lift your thighs up, tighten your shoulder blades and straighten your torso, preventing your shoulders from falling over your neck and head!
Exhale and lift your two feet off the floor at the same time, even if it means bending your knees and bouncing off the ground. Slowly and in a controlled manner lift your heels towards the ceiling, while balancing your body. The center of the arch of the soles of the soles should be just above the center of your pelvis and your head in order to be in line and stay in the front post without falling. It is important to maintain a balanced weight on both forearms. You descent after exhalation, with both feet simultaneously stepping on the floor.
As a beginner, stay in this pose for 10 seconds! Gradually add 5-10 seconds each day up to 3 minutes! After 2-3 weeks, you can start adding 5-10 seconds over the three minutes again and the master time to reach is 5 minutes. You descent after exhalation, with both feet simultaneously stepping on the floor.
Chris is an experienced Calisthenics practitioner focused on isometric exercises and street workout. He founded thehybridathlete.com in 2017, which was subsequently acquired by theyhybridathlete.com
He is based in Portland and has been working out using solely his own body weight and bars for the past 6 years.